Add to Cart
Metallurgical Analysis Investigation Software With Image Processing
Applications:
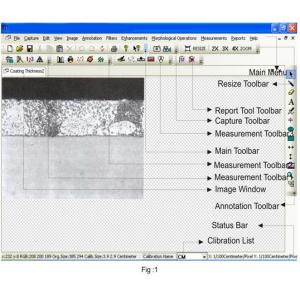
META VISION is an advanced metallurgical software, and suit a wide range of metallurgical applications with utmost metallurgical analysis & investigations. It is user friendly & very convenient to other equivalent metallurgical software.
Functions:
Features:
META VISION is suitable for a wide range of Image Analysis functions and the prominent functions are described hereunder:
1. Calibration:
2. Count & Classification:
Identification of objects in an image, count them, obtain several features measurements. Objects identification by user or automatically.
User defined classification on basis of size and intensity.
3. Threshhold Practical Measurement:
Manual, auto bright and auto dark methods to indentify Intensity range defined object to be measured. Various calculations & measurements available for selected particle are: dimensions, area, parameter feret, length, thread length, thread & fiber width.
4. Morphometery Measurement:
Line measurements for distance, length, width perimeter, angle, three point radius. Roundness, shape, orientation, elongination, equal circular diameter, equal sphere volums.
5. Local Analysis:
Centroid X, Centroid Y, Major Y1, Minor X1, Major X2, Major Y2, Minor X2, Minor Y2, Box X2, Box Y2 &Box Area.
6. Phase Analysis:
Measure area fraction & volume fractions. Identify multiple phases with Micro Structure. Also delinate phase from the histogram as per ASTM standard E562 & E1245.SS.
7. Nodularity:
Measure Nodularity as per ASTM 247 standard. The Nodules & Flakes are separated on the basis of its shape and aspect ratio. The detail measurement of each micro structure is available for further analysis. The processed image displays non-Nodules in different color. The Nodules can be classify by its range on the basis of its size & shape.
8. Porosity:
They are recognized on the basis of its intensity as per ASTM B-276 standard. The measurement of each pores displayed. The processed image displays pores in Red Color.
9. Coating Thickness:
This application rapidly measures the thickness or width of a coating at multiple positions along a sample as per ASTM B487 Standards. Tabulated results available for min/max and mean of width Measured at various points of sample cross section.
10. Decarburisation:
Measured depth or width of decarburidation occurs as per ASTM 1077 standards.
11. Grain Size:
The module analysis Grain image and measure the Grain size using ASTM E 112 method.
The available options for measurement are:
Various filters to make use defined templates. Grain boundary repair mathematical function.
12. Non-Metallic Inclusion:
Measure inclusions and report ASTM E-45, E-1245 numbers, cumulative length width ratio.
13. Graphic Flakes:
Graphite Flakes length, Width distribution and Percentage as per ASTMA-247-67
14. Report: